
Platformer Game (Part 1)
This series of tutorials describes the creation of a platform game for the MakeCode Arcade development environment. This tutorial is based on the Jumpy Platformer game listed under the development environment.
In the first tutorial we describe what features to include for the initial level, how to create the player character and code movement, and how to create the initial level based on the design. This task is suitable for beginner coders, however it is recommended that students work through the Beginner Skillmaps first.
Step 1: Level Design

Initial platformer design on paper
Design your first level on paper satisfying the following requirements
- 32x8 blocks
- Ground layer
- Start position
- End position
- Walls and platforms
- Collectables (e.g. coins)
- Enemies
Step 2: Player character
1. Create and set the sprite for the player.

Set player sprite
2. Set the movement controls for the player. The player will move left and right.

Set the movement controls.
3. Set up the A button so that the player will jump when A is pressed. Velocity should be a negative number. Try -100 to start then experiment with the values once you have set up the level map.

Jump when A button pressed
4. Set the acceleration for the player. Try 100 to start for the acceleration and experiment when the level map is set up.

Setting the vertical acceleration to represent gravity.
This block is available in Sprites under Physics. It will show as

Set block to set physics attributes of a sprite, including velocity and acceleration.
Change x to ay.
Your “on start” code should look like the following.

Code for setting up player sprite and movement
Step 3: Building your first level
Add a “set tilemap” block at the end of the “on start” block.

Set tilemap block
Click on the tilemap to enter the tilemap editor. Change the size of the tilemap to 32x8.
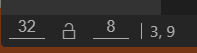
Setting the tilemap size
Next, create tiles to represent the following
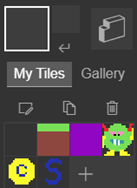
Creating new tiles
- Ground
- Platforms
- Start position
- Finish position
- Enemies
- Coins/collectables
Create the layout of the level, adding the ground, platforms, start position, etc in the appropriate location following your on-paper design.

Creating the initial level
Click on the add walls button and set the ground and platforms to walls.

Making the floor and platforms solid
After closing the tilemap and returning to your code place the player on top of the start tile. The second block is necessary to get rid of the player location tile. This code should be added at the end of the “on start” block.

Setting the starting location for the player.
Next, set a background for the level. I have selected one of the built-in backgrounds - however you could design your own.

Setting the background
Finally, set the camera to follow the player.

Adding a camera.